
I know, installing Google Analytics on your WordPress website isn’t as easy as it could be.
Let’s change that.
I’m going to help you not only create a Google Analytics account (and get your tracking code) but I’ll also show you how easy it is to install on your WordPress website.
Sound good?
Let’s go!
Step #1: Setup a Google Analytics Account
Obviously, we’ll need a Google Analytics account.
If you already have one, great. If you don’t, visit https://www.google.com/analytics and sign up for an account by clicking “Small Business” and then the “Get Started” button under Google Analytics, like below:

Follow the steps that Google walks you through until you’re finished signing up.
Whew! Getting closer!
Step #2: Create a New Property in Google Analytics
Don’t let the word ‘property’ confuse you. We’re just creating a spot in Google Analytics to keep track of our website traffic.
Go ahead and log in to Google Analytics at https://analytics.google.com
Once you log in, you’ll see the wonderful Analytics Dashboard:
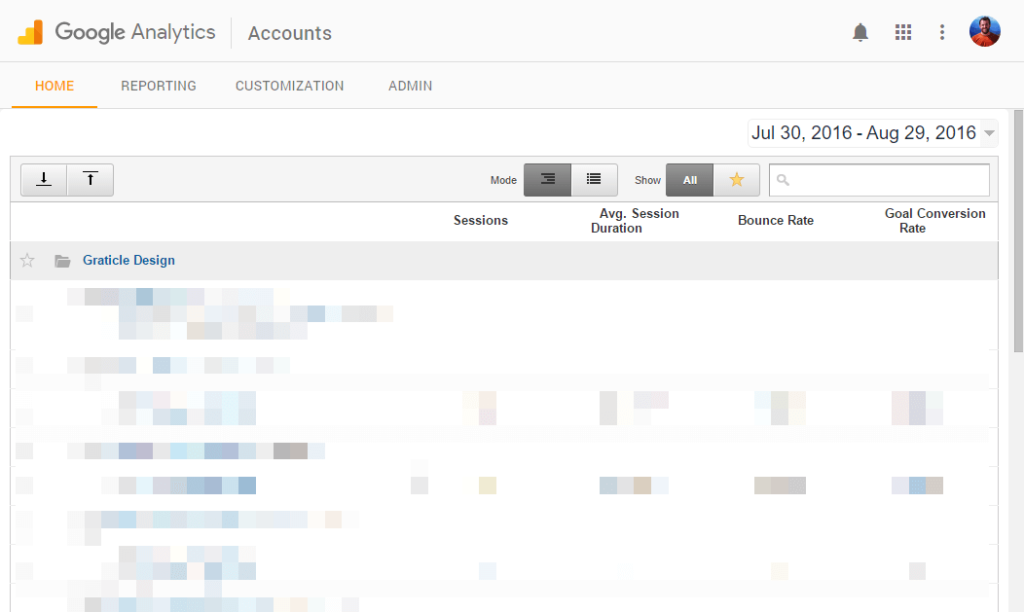
Now, we want to add our website so we can start tracking.
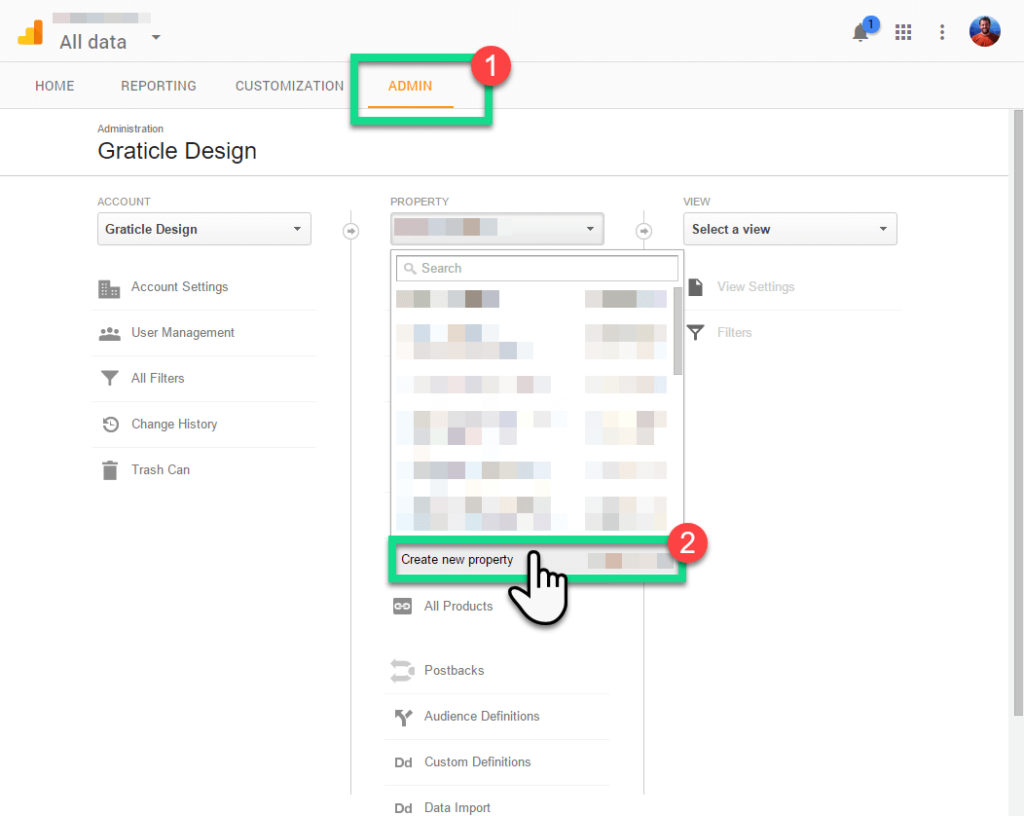
To do this, click “Admin” at the top of the screen, and then click the “Property“ dropdown, scroll to the bottom and select “Create new property“:
On the next screen, go ahead and add the information we need:
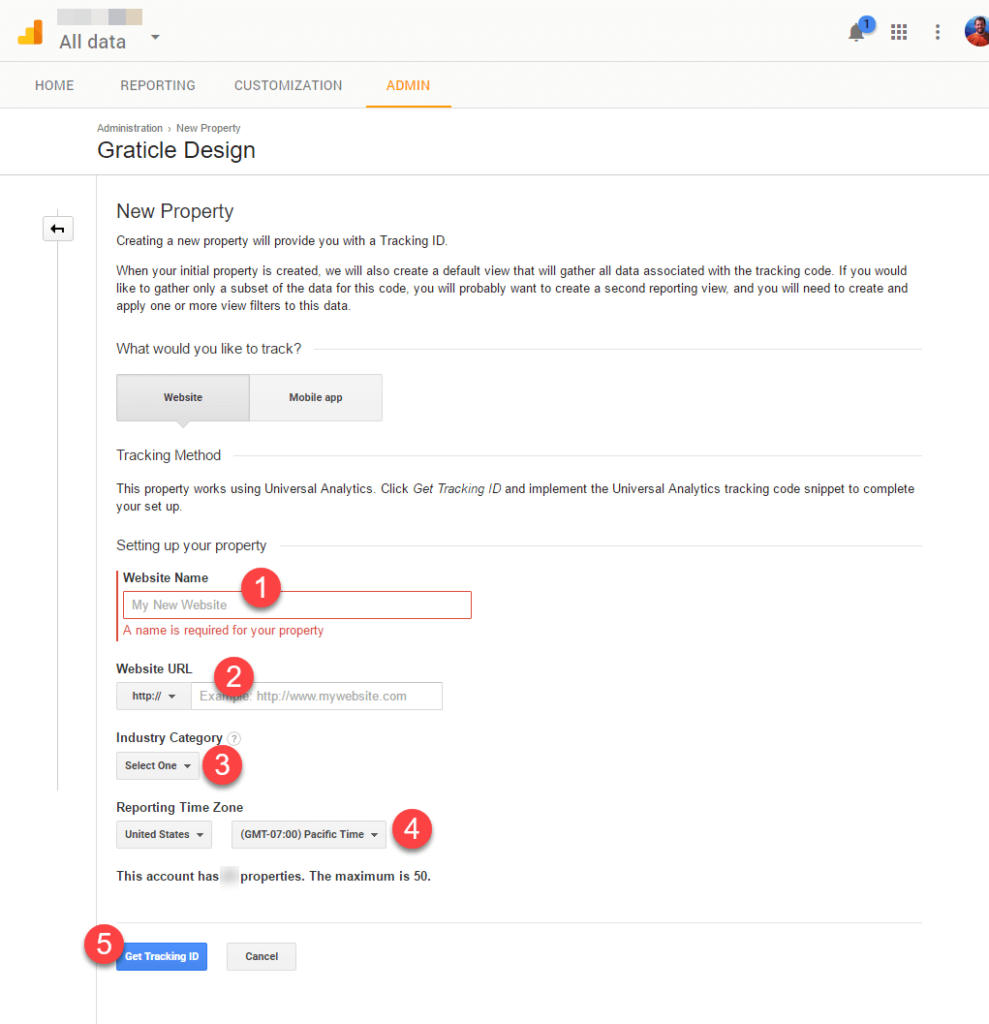
- Website Name: This is the name that will be listed inside of Google Analytics to reference later.
- Website URL: This is the website address of your website. For instance: domainname.com
- Industry Category: Select the closest category that best represents the industry your website is in.
- Reporting Time Zone: Select your time zone.
- When you’re finished filling out #1-4, click the “Get Tracking ID” button!
On the next screen…
![]()
There is only one item we’re interested in:
Tracking ID: This is the number that we’ll use to integrate Google Analytics in WordPress. Jot it down.
Step #3: Installing a Google Analytics WordPress Plugin
Now, we’re going find and install a WordPress plugin, add our tracking code and be on our way.
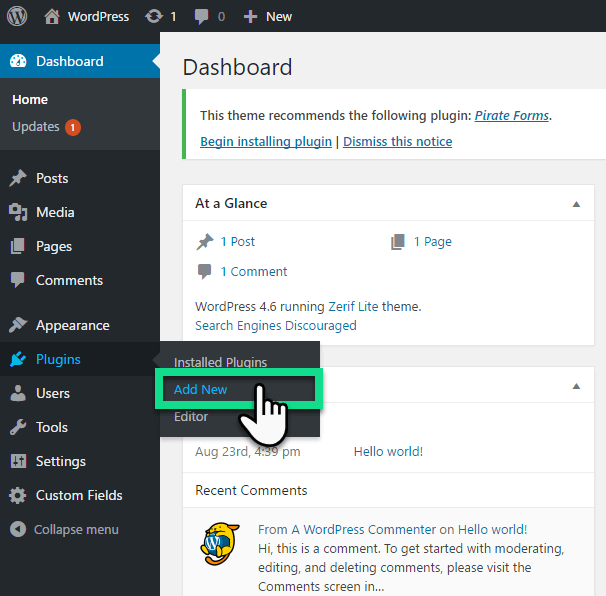
a. Log in to WordPress. Hover over ‘Plugins’ and click ‘Add New’
b. Click the ‘Search Plugins’ field and type in: ‘google analytics‘ and press enter
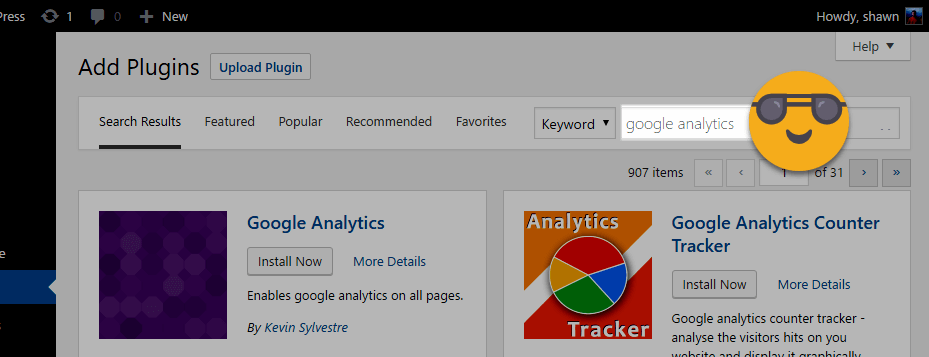
Right now, the first result is Google Analytics with a purple image as you see in the screenshot below.
c. Click ‘Install’ and then ‘Activate’:
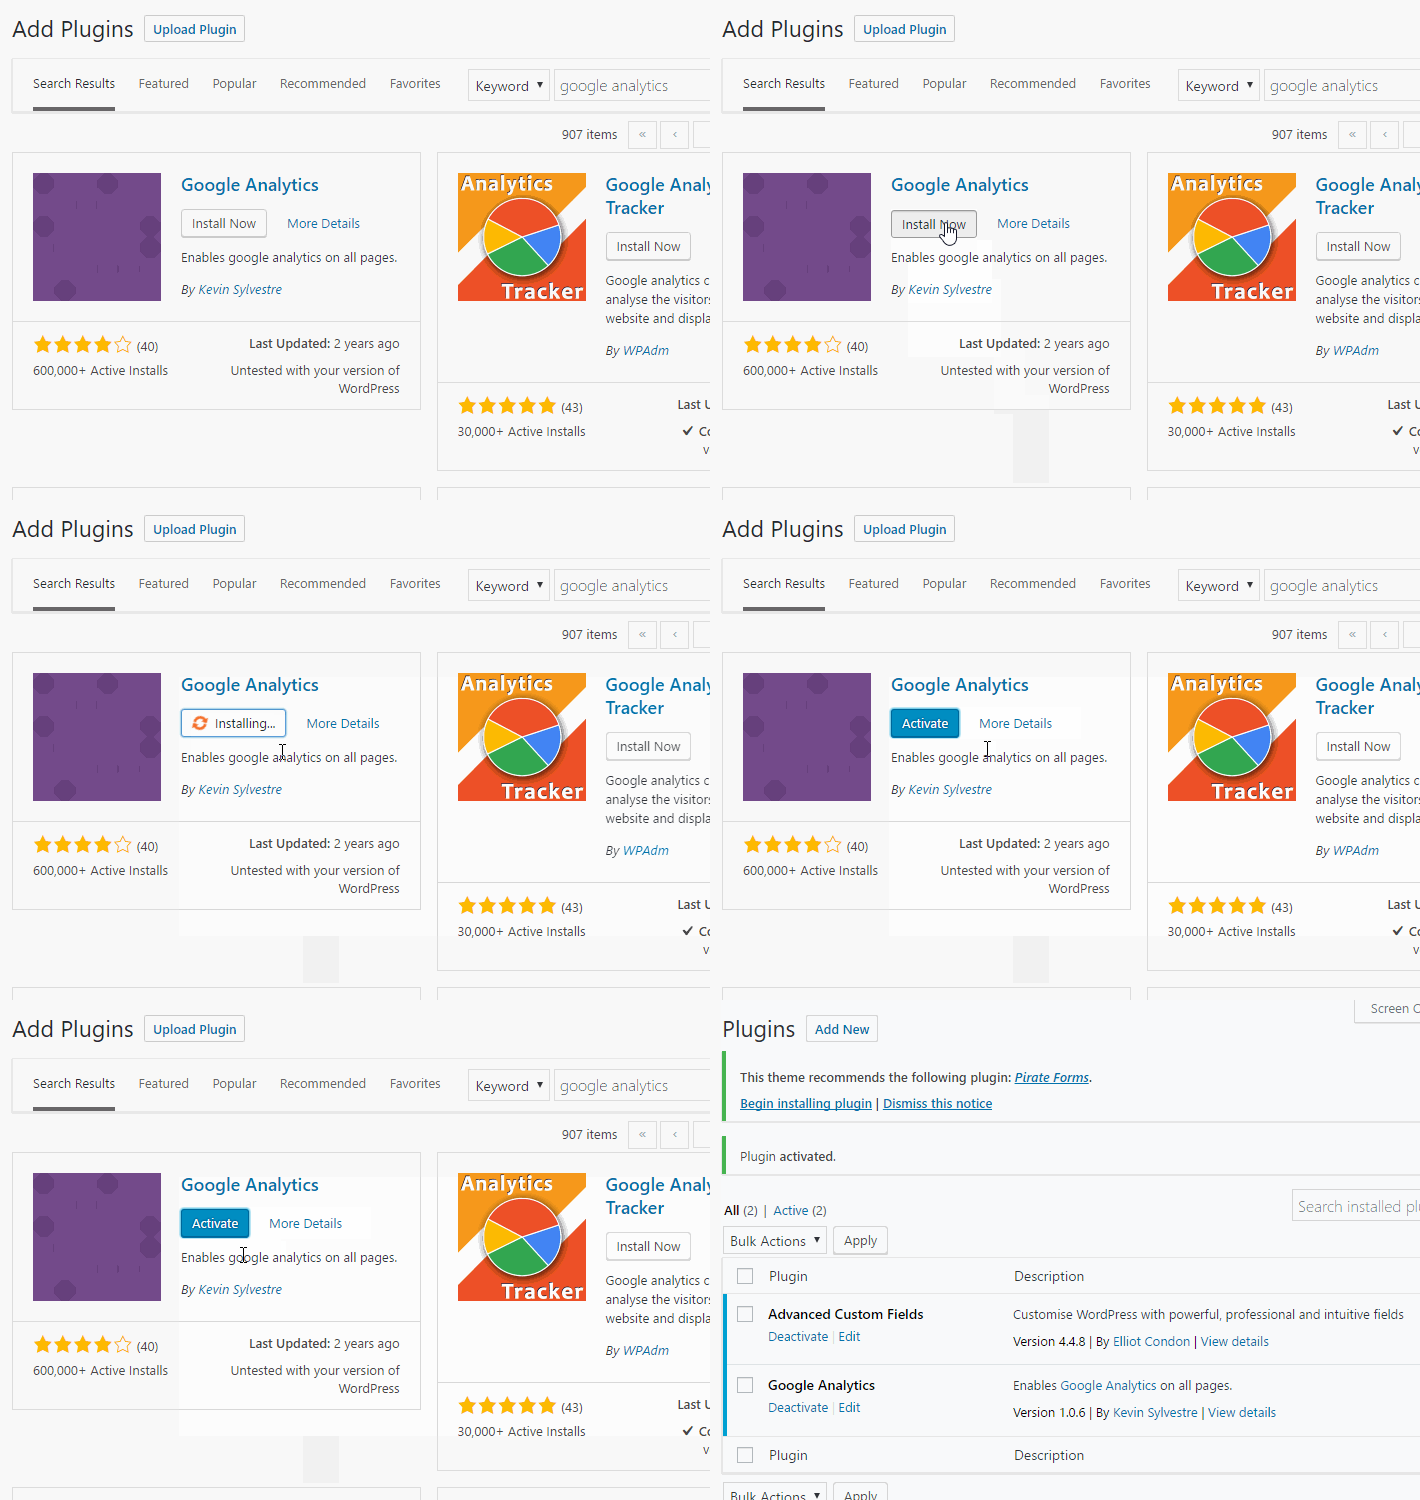
Now, let’s navigate to the settings page of the plugin we just installed.
d. Hover over ‘Settings’ and click ‘Google Analytics’
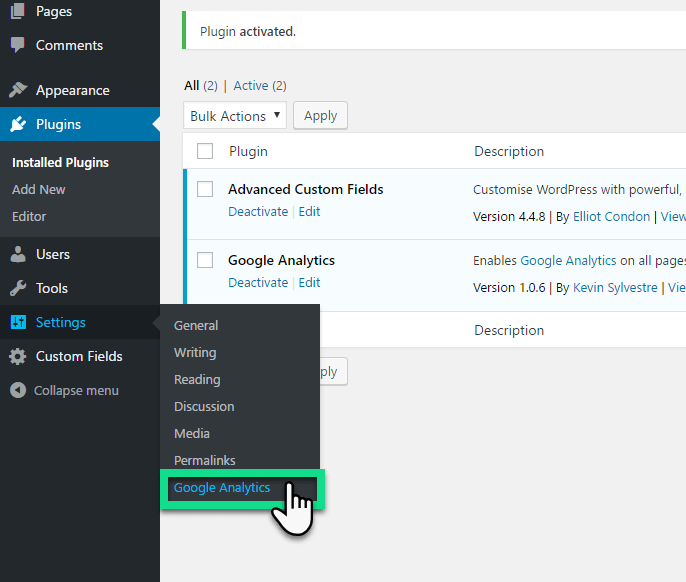
Remember that number from earlier that started with ‘UA?’
We’re about to use it!
![]()
Paste (or write in) that number in the Web Property ID field and click ‘Save Changes’ and…
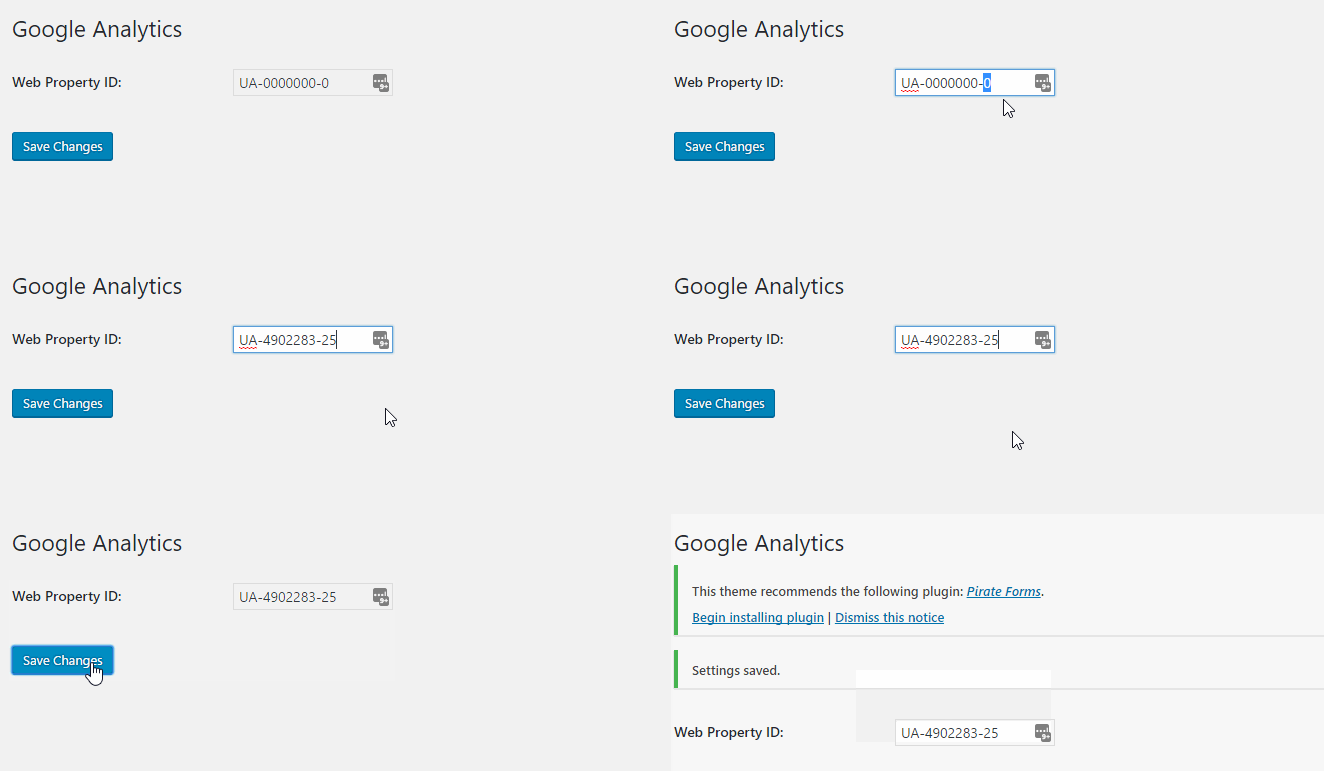
We’re done!
Expecting more steps? I know, it seems too good to be true, but we’re finished.
Checking Google Analytics
From now on you’ll be able to log in to Google Analytics and view the data on your website. Just know that it can take 24-48 hours before you start seeing the numbers come in.
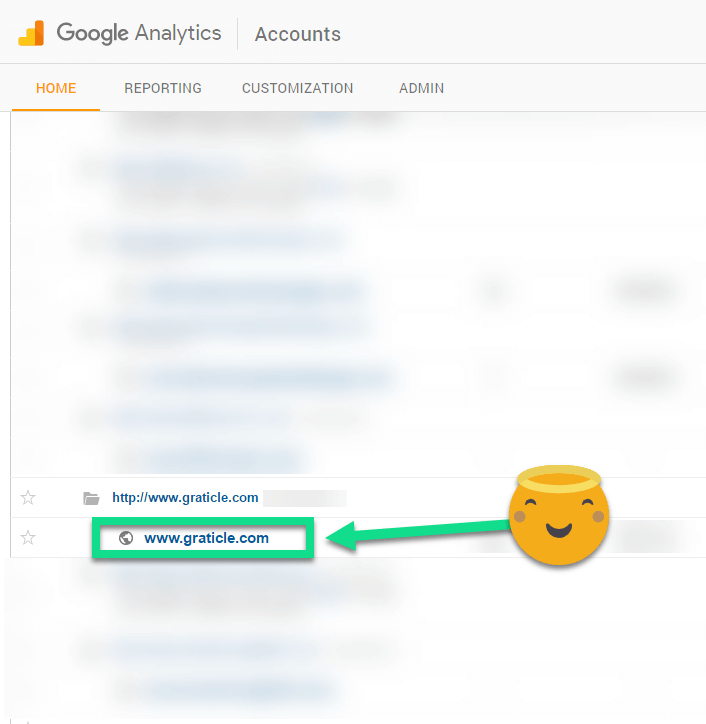
Once logged in, click your website address with the globe next to it and you’ll be taken to the dashboard of your analytics.
Wrap Up
Pat yourself on the back if you’ve made it this far.
You’ve just setup Google Analytics and integrated it into your WordPress website.
Since we’re only installing Google Analytics and not going over how to use it, this is where we go our separate ways. But don’t fret! On Google, search phrases like: “google analytics for beginners” and you’ll find loads of information to help you decipher the information Google Analytics provides.
Questions?
If these steps are intimidating, give us a call (360) 450-3711 (or email) and we’ll install Google Analytics on your WordPress website for you!


