
You know that little icon that shows up in a browser tab for websites?
That one above. That’s called a favicon. But, the terminology really doesn’t matter. You want your logo to appear there and want to know how to do that.
That’s exactly what I’ll show you how to do.
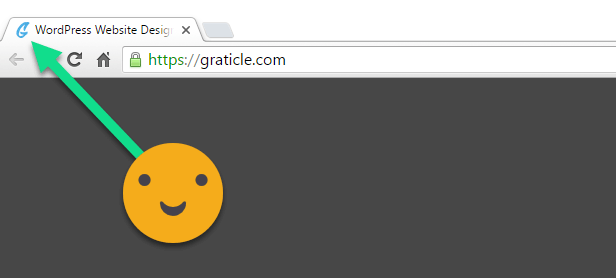
First, check if you have an existing icon (Psst! It’s obvious if you don’t see an icon like above), you can check on RealFaviconGenerator.net
Go there and type in the URL to your website like so:
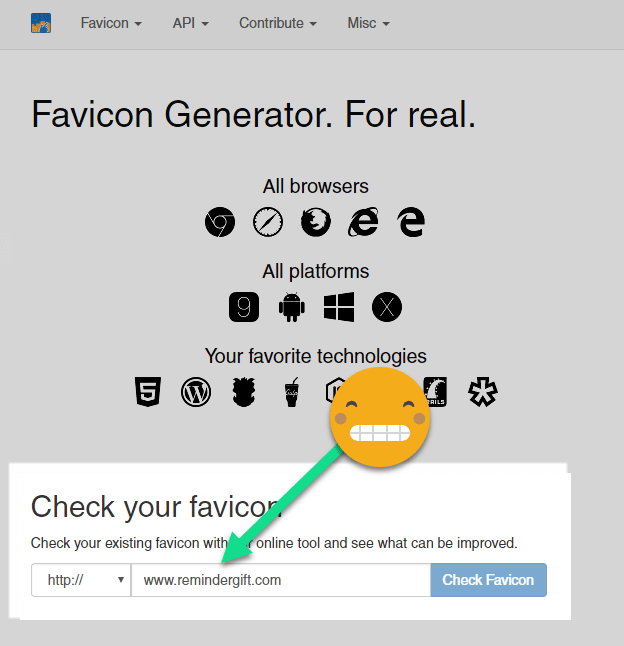
After a few seconds, you’ll have your results.
If already have your favicons setup, on the next screen you should see only green bars for each test:
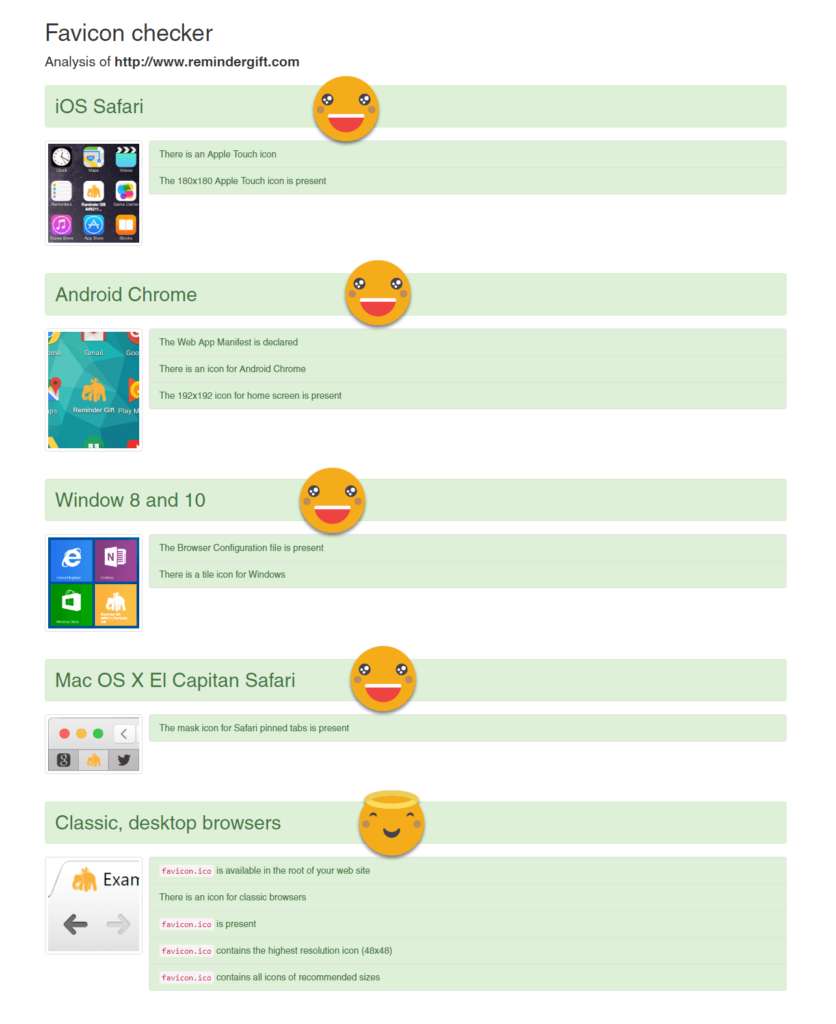
If you do not, you need to generate new favicons because some browsers and operating systems cannot see them.
Let’s Get Going!
I’m going to walk you through how we created a favicon for one of our web design customers, ReminderGift.
Not everyone has experience with Photoshop, so we’re going to use a free online tool. No need to install any software. If you have the internet you’re good to go!
First, let’s get your logo mark that you want to use.
The file can end in a .png or .jpg.
We took ReminderGift’s logo and removed the words from it, leaving us with only the elephant.
![]()
Go to Pixlr.com/editor
Basically, this is an online version of Photoshop and it’s very handy.
Click “Open Image From Computer”
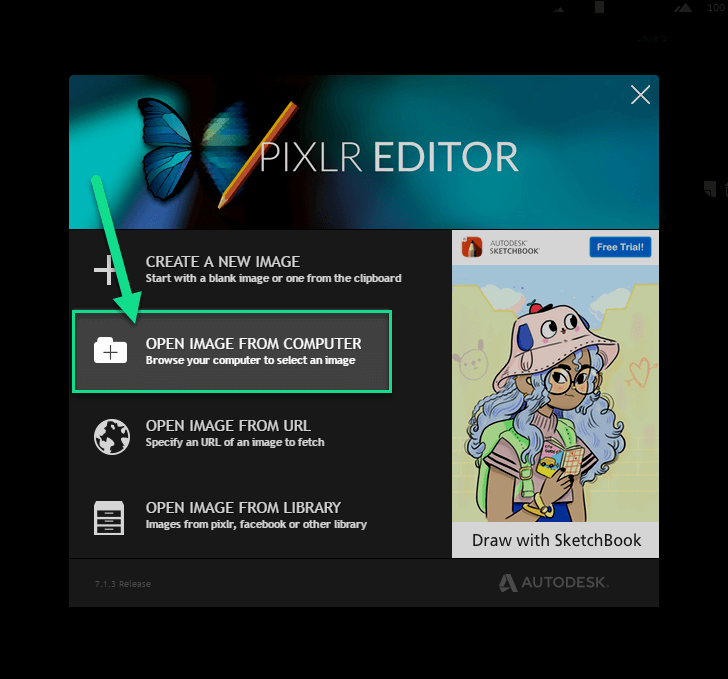
Find the logo image you want to edit and click “Open“.
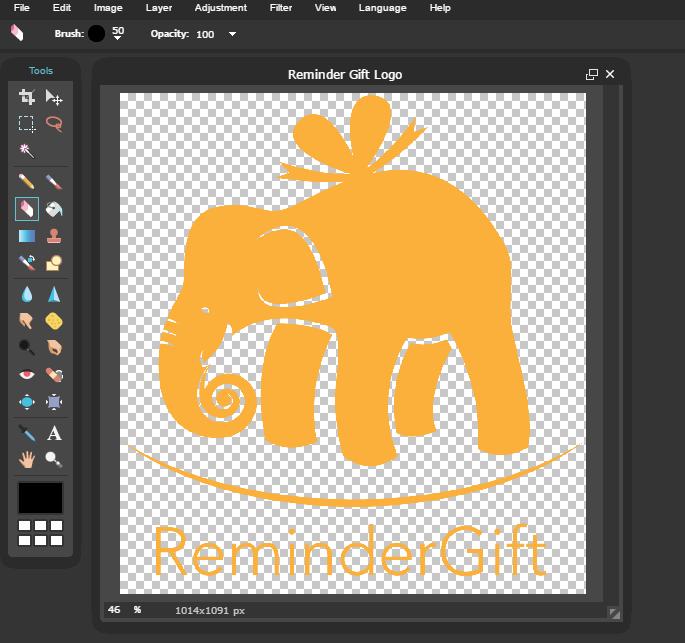
You’ll now see your logo open in Pixlr:
![]()
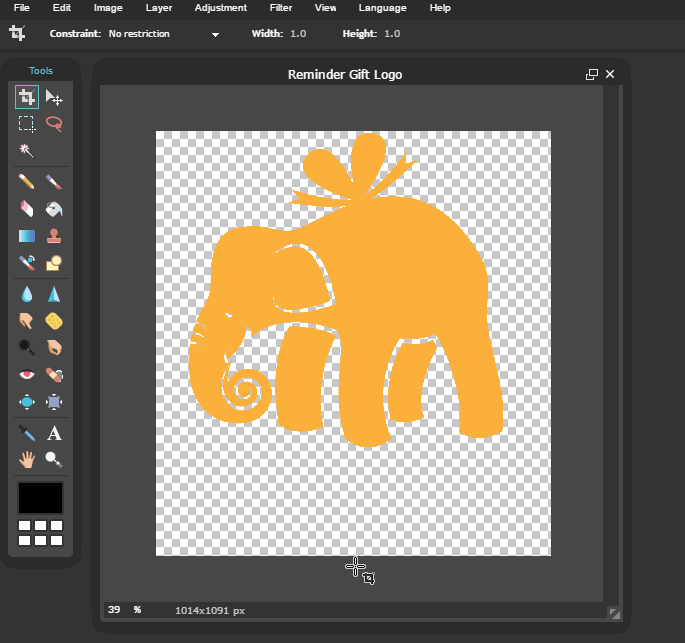
I should note here, for the best results, our final logo needs to be 260px wide by 260px tall and no smaller. It can be larger than that, just not smaller.
How do you find the size of your image? Easy:
At the bottom of the image is the size of the image itself.

As you can see, we’re working with an image that is 1014px wide by 1091px tall. Well above the 260px by 260px final image we’ll need. With that, let’s move on!
Now, we need to do a few things: (1) Remove anything unnecessary in the logo (like words, remember, this is going to be tiny, any words will be unrecognizable) (2) crop the image to a perfect square (proportional height and width).
Let’s get started on those two items.
For erasing, click the Eraser button and erase what’s not needed:
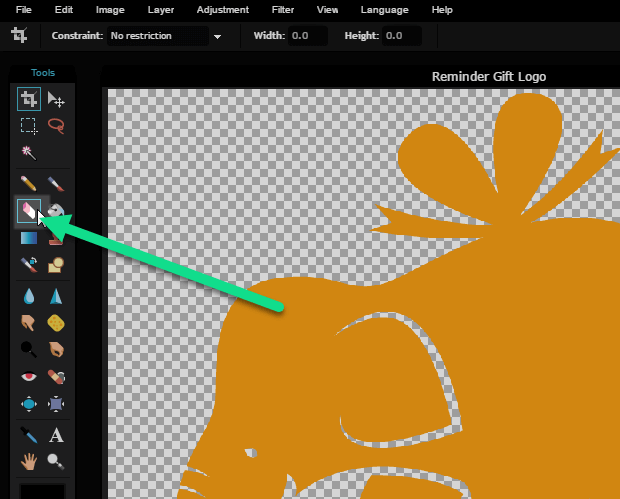
By default, the brush may be small so as you can see in the video below, I made the brush larger and erased everything I did not need.
Now that we have our mark ready, let’s crop the image to a proportional square.
Pick the crop tool:
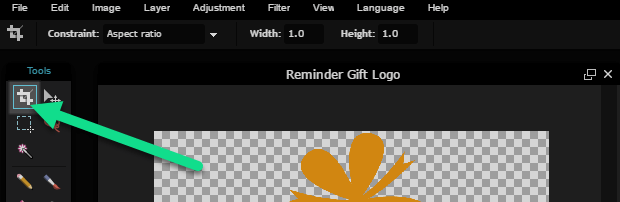
Now, select Aspect Ratio under “Constraint” (located at the top-left of the screen) and make sure Width and Height are both set to 1.0. Then drag a square (don’t worry it’ll be proportional!) and have the square close to the edge of your logo and when ready, double-click and viola!
Here’s exactly how to do that:
Now, it’s time to save it.
Click “File” then “Save”.
Now, make sure “Format” is set to PNG (Transparent, full quality)
Then, click OK.
Pick out a location on your computer to save it and click Save.
Whew! Now, we’re really moving!
The next step is creating the favicon to use on our website. Refill your coffee and come back. Ten more minutes after this and we’ll be done!
Generating the Favicon
There are many tools online, but by far and away the best I’ve found is RealFaviconGenerator.net
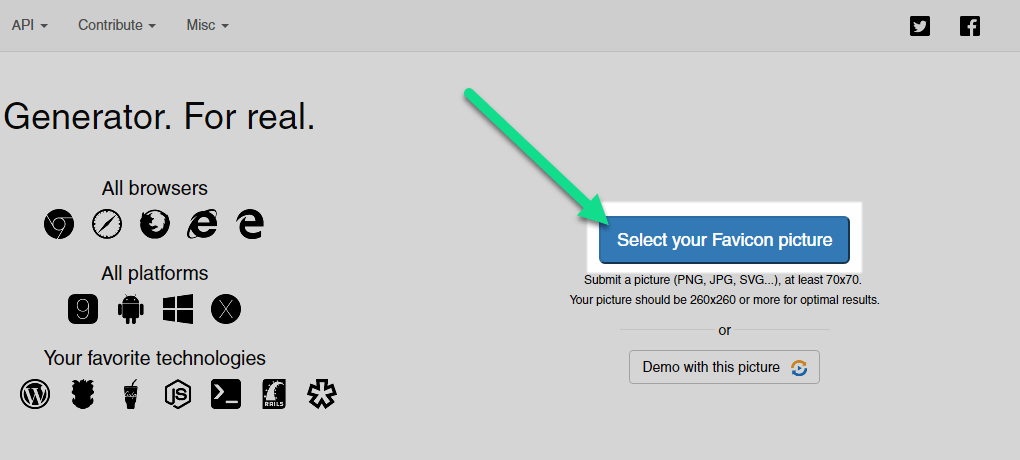
Go ahead and go to RealFaviconGenerator.net
Click the “Select your Favicon picture” button and find the square logo we created previously in Pixlr.
The program will take a few seconds and will present a new screen with a lot of options. Don’t worry, we’re going to keep this nice and simple and ignore most of those settings. You can deviate from the path we take, but do so at your own peril!
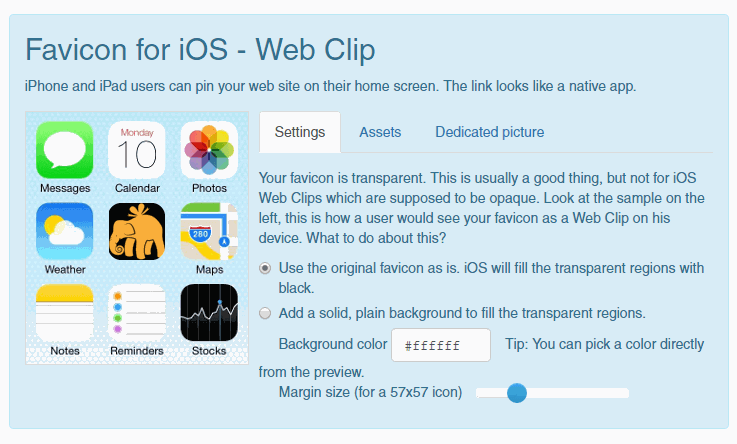
Favicon for iOS – Web Clip
Typically, adding a solid, plain background and adjusting the margin works great:
Favicon for Android Chrome
There are quite a few more settings for Android, but again, let’s keep things simple. Adjust to your eye:
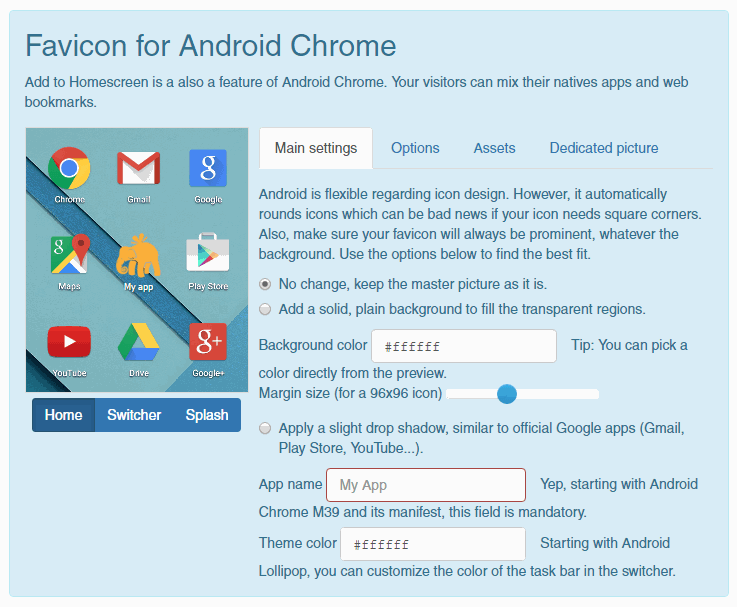
As you can see, I tried adding a background but opted to go without since I think it looks better and more in line with the look of Android.
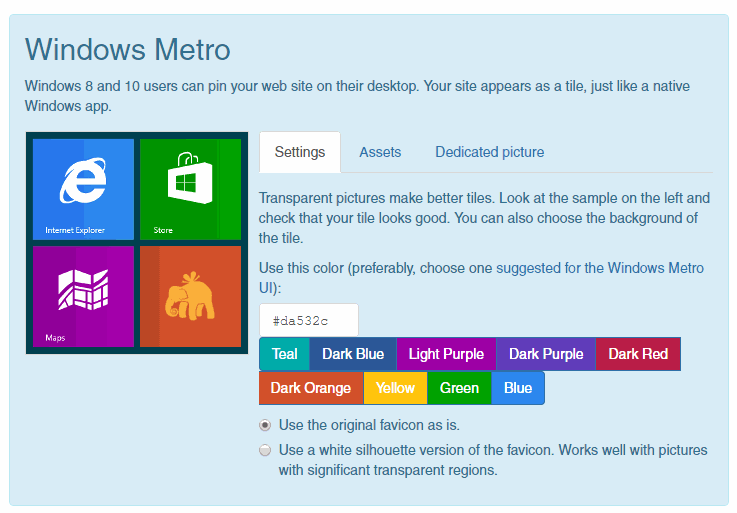
Windows Metro
Windows is easy, too. Click the color code, and then click the color from your logo and then select white silhouette. This logo fits right in on Windows!
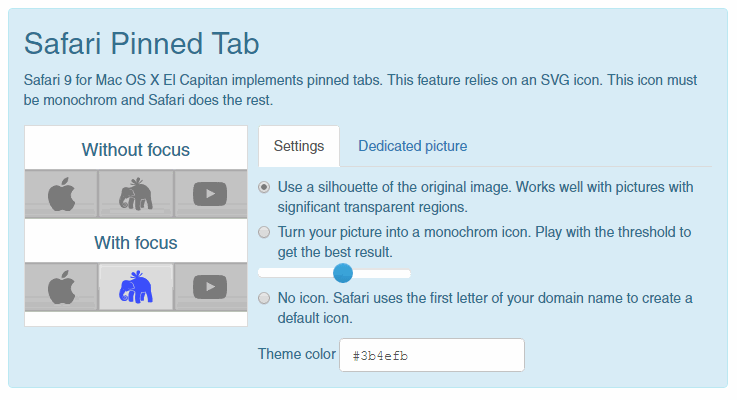
Safari Pinned Tab
For Safari, copy and paste the color code we selected above (in our example, that’s #fbb03b) and paste in “Theme Color.”
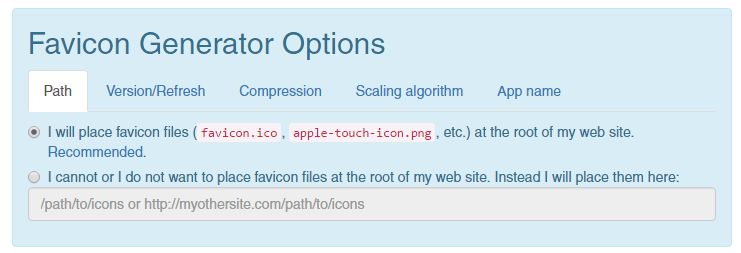
Favicon Generator Options
Leave these settings alone.
You’ll notice, we’re going to place the favicon files at the root of our website. I’ll explain what this means, don’t fret!
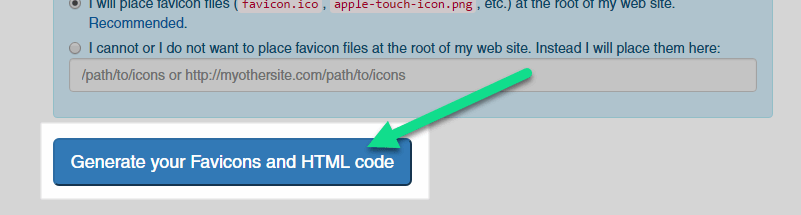
Now, click the “Generator your Favicons and HTML Code” button at the bottom.
We’re just about there!
Install Your Favicon
Don’t let this screen intimidate you, it’s easy.
Two important items on this page (1) Favicon package button (2) Code:
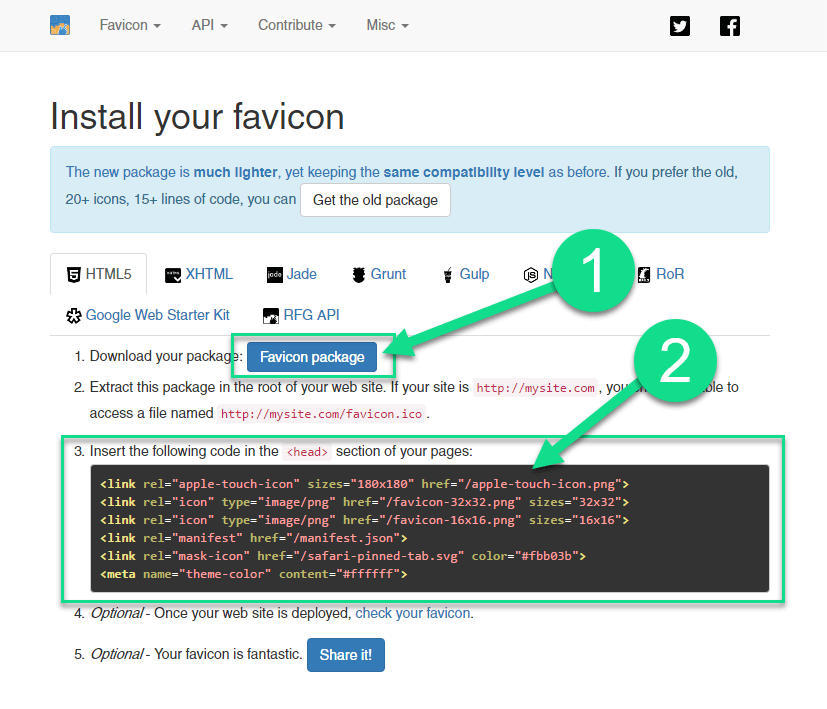
Let’s go ahead and click the “Favicon package” button This will download a .zip file on our computer.
Open the .zip file and drag the contents to the folder on your computer.
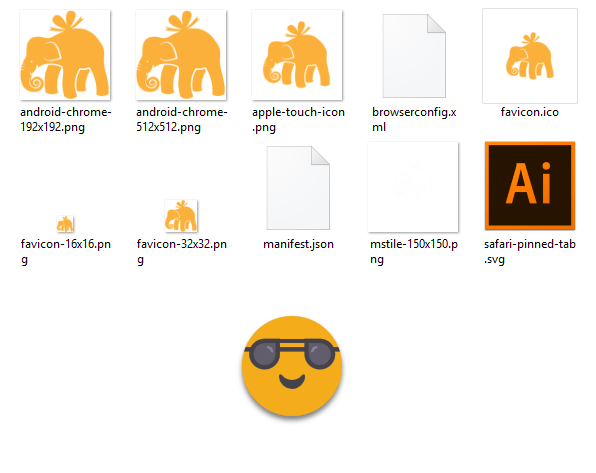
These are all of our favicons!
The next step is a bit tricky depending on your comfort level with uploading files to a server. But, I’m guessing you’ll be able to figure this out and walk through the steps below.
You can connect to your server using a program like FileZilla (Client) or through a web interface through your host like File Manager in cPanel.
For the sake of time, and ease of use, we’re going to use File Manager in cPanel.
Log in to your hosting account and you should see a File Manager icon.
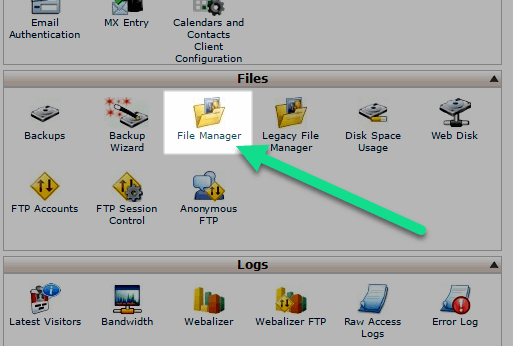
If you’re able to access this, you’re golden.
Click the File Manager icon and a popup will appear.
Select “Web Root“ if it isn’t already selected.
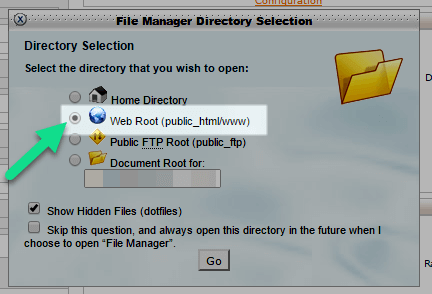
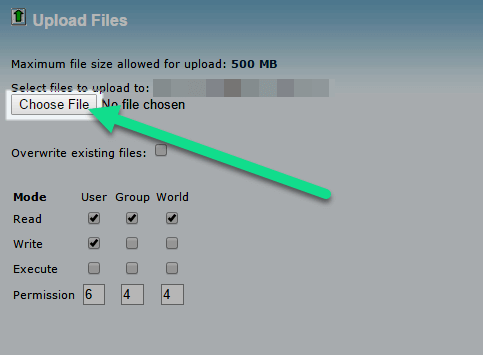
On the next screen, click “Upload.”
This will open a new tab. Now we need to individually upload each of the files we exported from our .zip file earlier.
Click “Choose File,” select the first file and it will automatically upload. Repeat until you’ve uploaded all of the files.
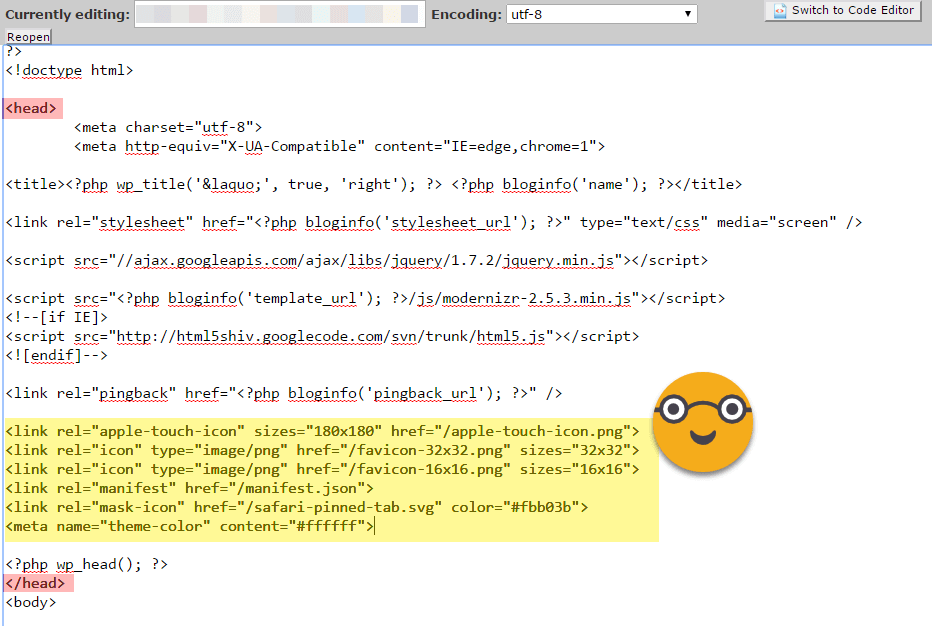
The final step is adding the code that RealFaviconGenerator gave us earlier.
Depending on how your website is setup, this can be a complex because there are a lot of places this can possibly go. We need it to be inserted into our “header” file which is repeated on every page so that each page displays a favicon.
In WordPress, this file is located in your theme folder.
For example: public_html/wp-content/themes/[your-active-theme-name]/header.php
*Make sure you always have a backup of your website before proceeding. Once you edit any file on your server, there’s no magic undo button, unless you have a backup service with a company like us.
If you feel comfortable, find your header file and then click the “Edit” button.

Insert the code between the <head> and </head> tags, like so:
Now, click “Save“ at the top-right corner and…
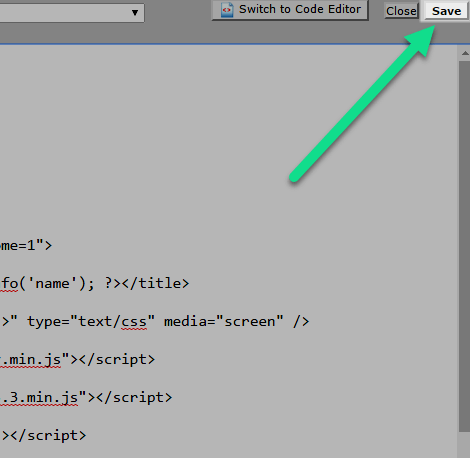
DONE!
If you want to test out that everything is working correctly, retake the test we did earlier at RealFaviconGenerator.net/favicon_checker
All green!
Comments, Questions, Life Raft?!
Now, that took a lot of time and energy on your part. Pat yourself on the back if you were able to follow everything laid out above.
If you ran into any problems and can’t figure it out on your own (or just don’t want to break anything!), you can always hire us to complete it for you. We’ll not only create a nice favicon, we’ll take care of every step you read above. It doesn’t get much simpler than that!
Give us a call (360) 450-3711 (or email) and we’ll create and setup a favicon for your website!


