* This is the first tip in a series to help people with common WordPress mistakes.
For this tip, we’re going to look at images, specifically, image sizes.
We all use images in our websites, but often beginner WordPress users will insert billboard-sized photos.
You’ve seen it before. You load up a website and …

If this is your website, you probably don’t mind. After all, you’re worth the wait, right?
Meanwhile, outside your fish bowl, people are hitting the back button and heading out.
Google is also noticing this, along with the slowness of your website, and guess what? Ranking your website accordingly.
Translation: YOU are losing money.
Using Images in WordPress (The Correct Way)
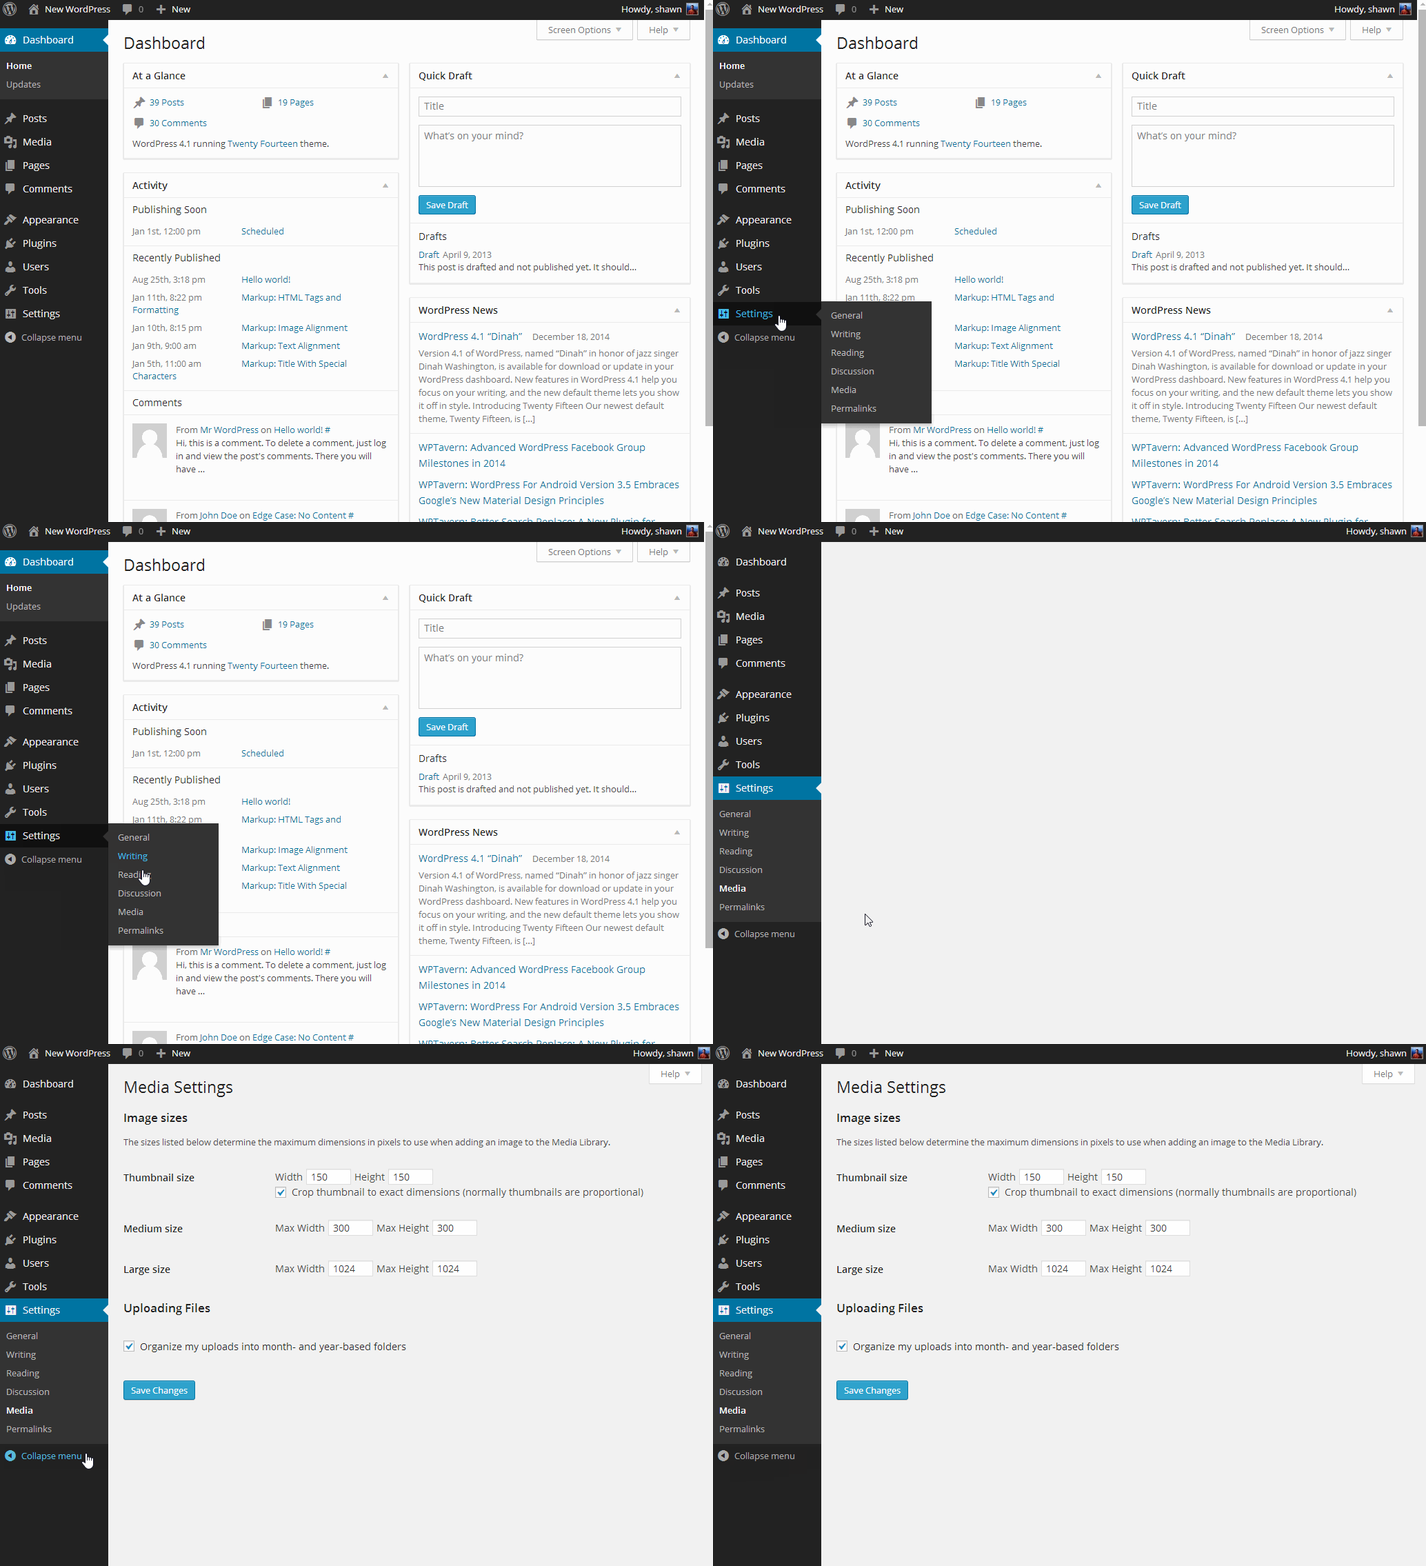
To start, let’s make sure we have our image sizes setup correctly in WordPress.
Out-of-the-box, these are the default settings:

I won’t go into detail of the correct image sizes, but this is where you change those settings if needed.
When you upload an image, WordPress automatically resizes that image to the Thumbnail size, Medium, Large and any other custom sizes that your developer* or theme has created. That way you can select the correct image size for the occasion.
When you insert an image on a page or a blog post, almost always you will not want to use the Full Image Size. You’ll want to use the Large or Medium sizes (or even Thumbnail if you need, a thumbnail.).
If you’re only displaying an image at say 300px wide by 300px high, there’s no reason to use anything larger than that (unless you’re targeting higher definition displays, which we’ll leave for another post).
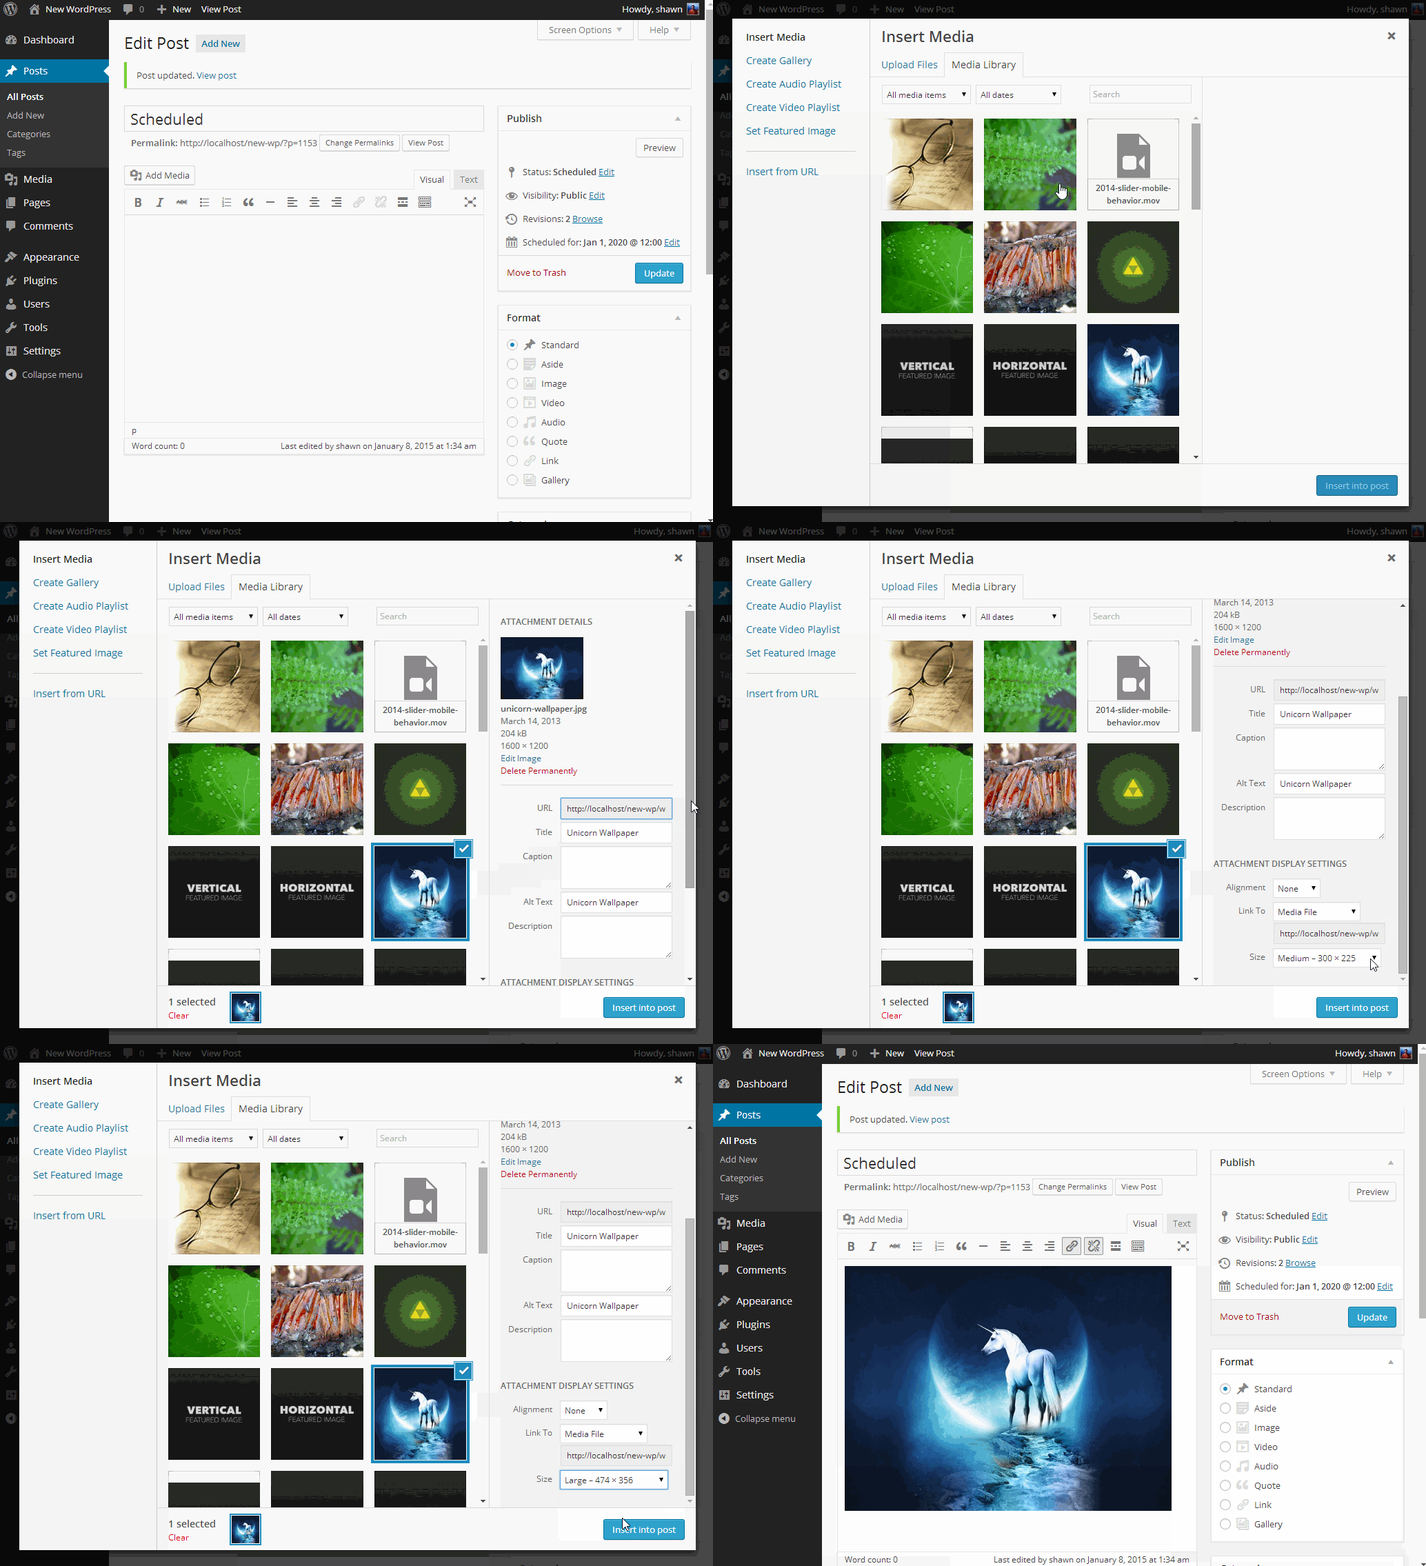
Selecting the Correct Image Size
You can select the image size immediately after you upload your image (or even if your image is already in your Media Library).

And, Done.
Psst!
* If you’d like to have more than the three default sizes (Thumbnail, Medium, Large) give us a call and we’ll help you out.


