First, let’s start with what a redirect is:
What is a Redirect?
A redirect is a URL that will “redirect” to a different URL.
For instance, if someone types in (or clicks on) www.graticle.com/review it will take them to:
https://g.page/r/CexGeg0O2_dhEBM/review
It eliminates the need for the user to type in (or remember) the exact URL to leave a review on our Google+ page. Now it’s easy. They only have to remember to type in /review, rather than the gibberish above.
Short on Time / Visual Learner?
No need to read, we created this video that goes over everything in just one minute!
Otherwise, you can keep reading below!
How to Create a Redirect in WordPress
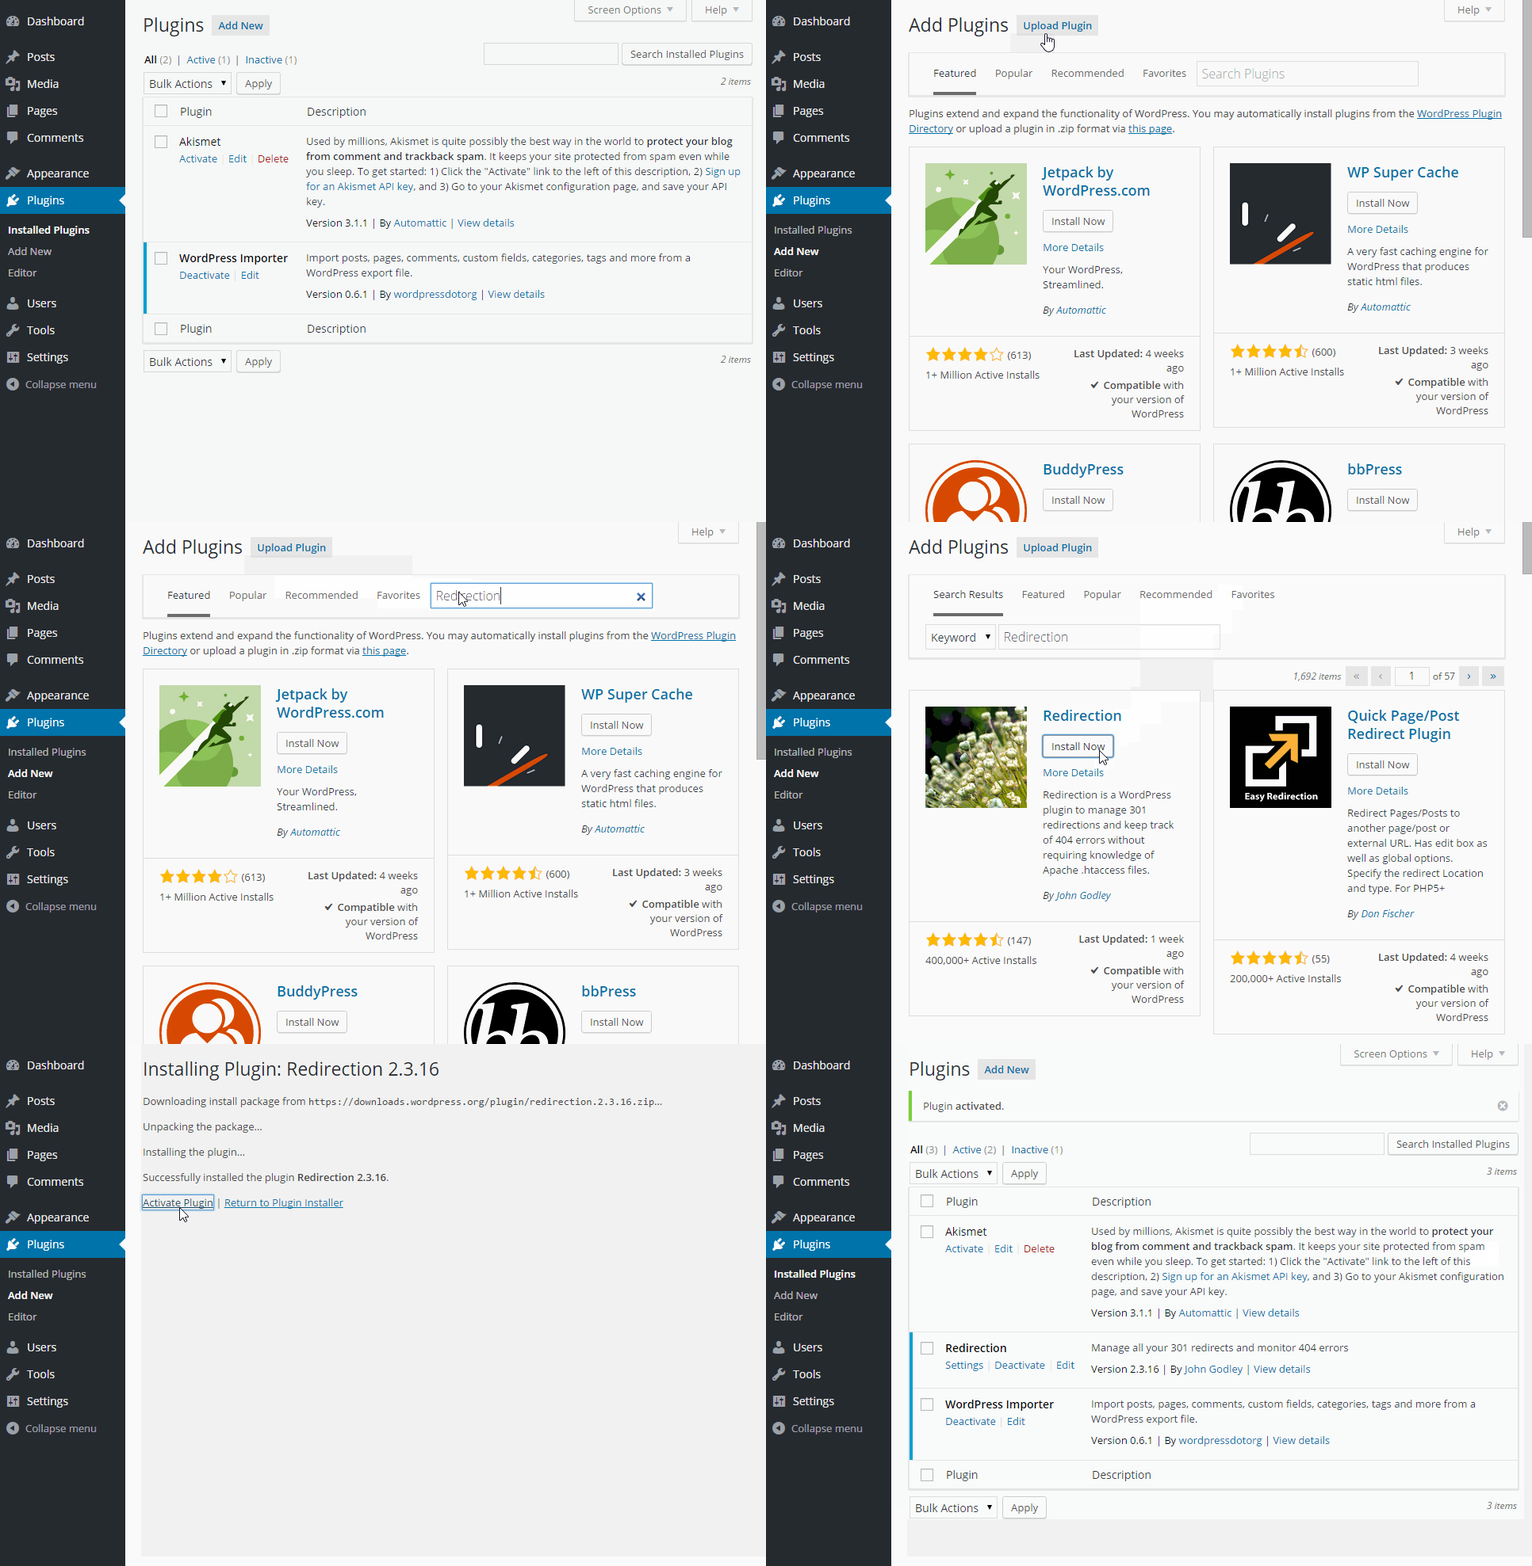
In WordPress, you can The Redirection Plugin in the WordPress Plugin Directory that will make this simple.
Install and active the Redirection plugin.

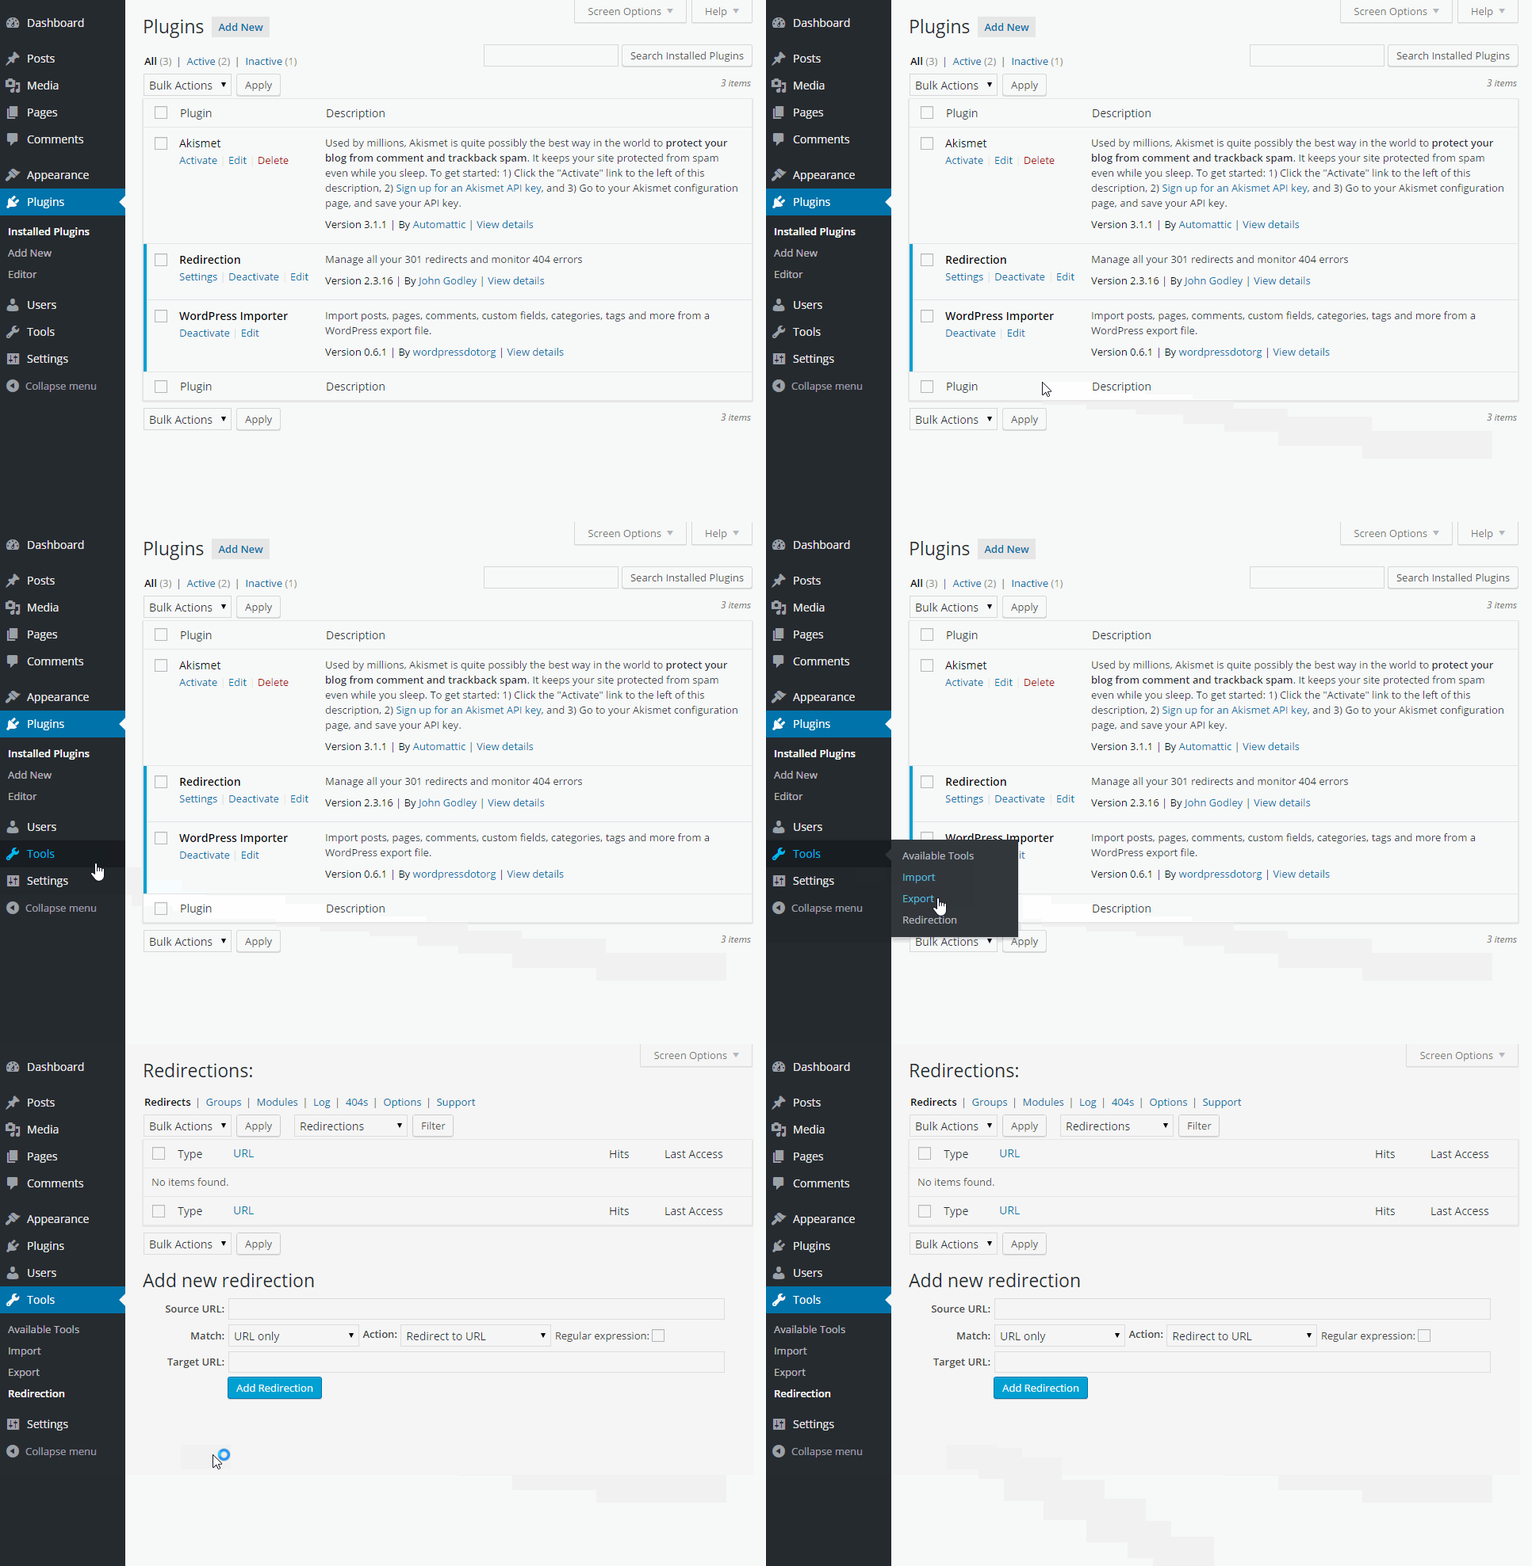
Next, view the Settings:

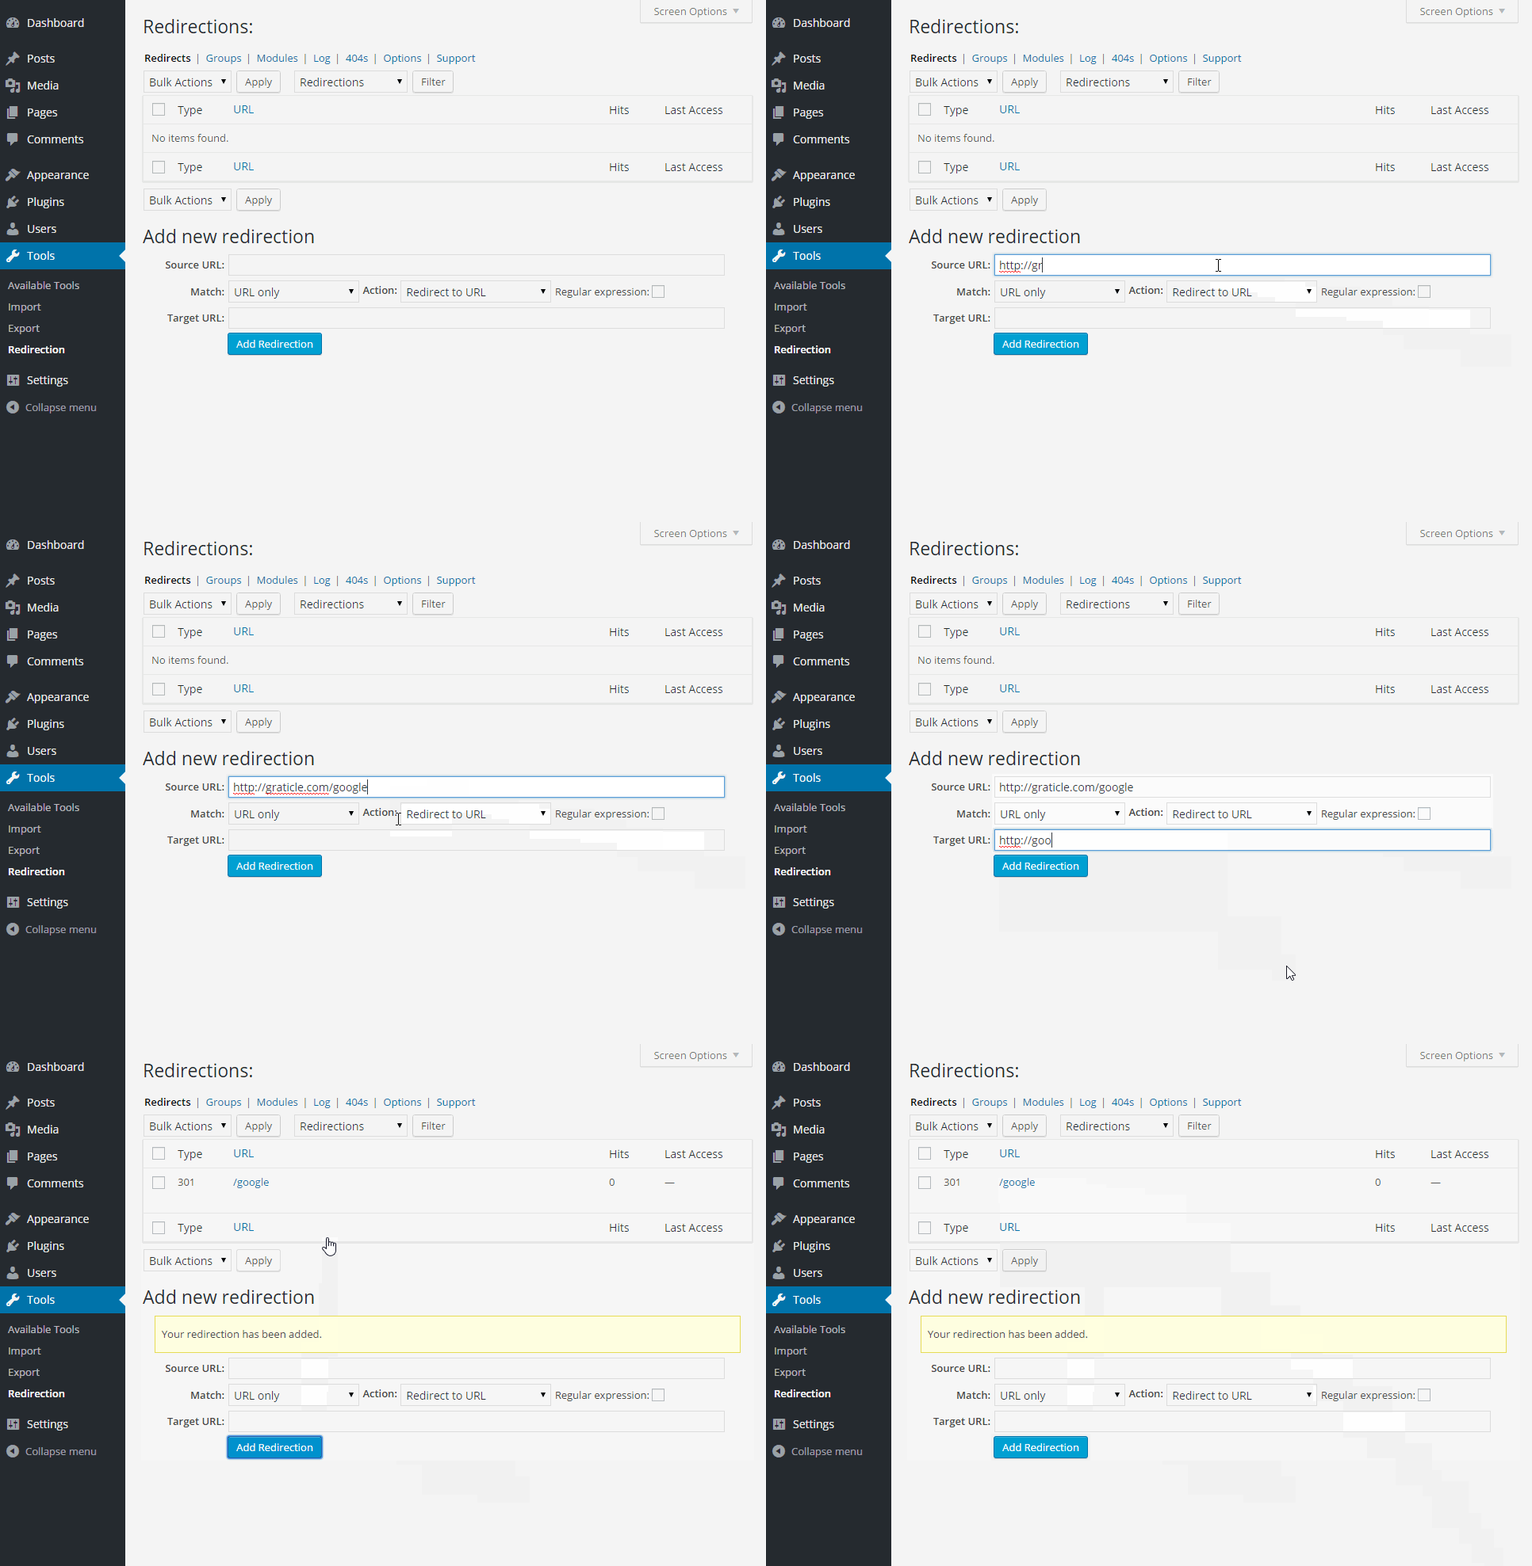
Create the Redirection
To create the redirection, you have two fields to fill out: Source URL and Target URL.
Source URL: The URL that the user will type in. For example: https://graticle.com/google
Target URL: Where you want to send the user. For example, https://google.com

Now, when someone types in https://graticle.com/google, they will be taken to https://google.com
Use Cases
Now, typing in graticle.com/google to go to Google isn’t practical.
So instead, here are helpful ideas for redirection you can use today:
Social Networks: Make it easy for users to find your social networks. Use /facebook, /instagram, /twitter, /snapchat
Reviews: Make it easy for your customers to leave a review. Use /review, /yelp, /googlereview
Personalize: Have a resource you want to share with a customer? Use their company or contacts name. Use /shawn, /dave, /pepsi
Another great use for redirects is for tracking in analytics, but we’ll leave that for another post.
—
Thanks for reading and I hope you got something of value out of it.
Have a friend that would benefit from it?
Share it with them using https://graticle.com/redirects


